
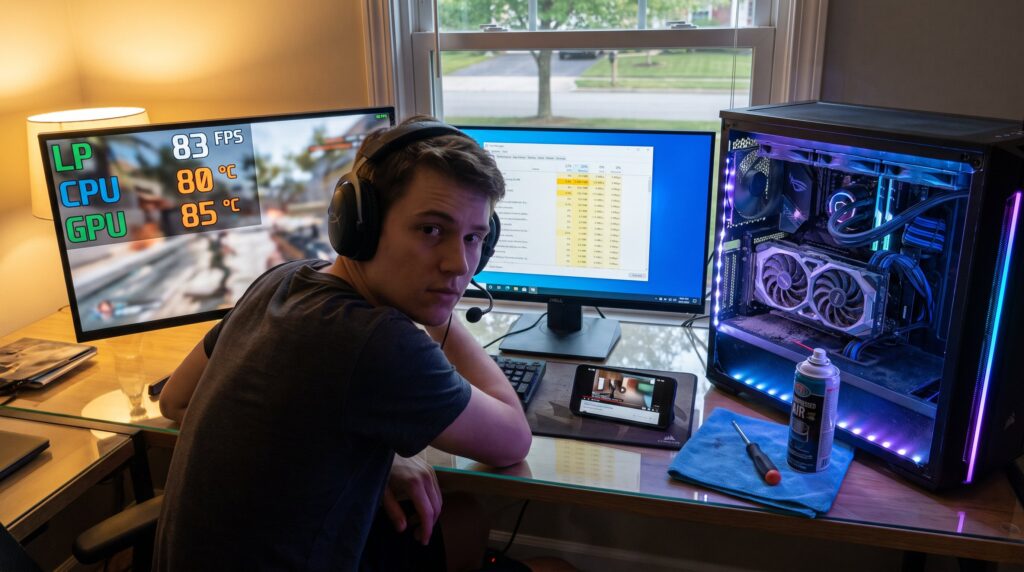
How to Troubleshoot Common PC Gaming Performance Problems starts with measuring what actually moves during play. The fastest fixes come from hard numbers: FPS, CPU/GPU load, and temperatures. This guide shows how to turn measurements into precise actions. It avoids vague tips and gives stepwise checks that a player can run in one gaming session. The tone stays practical and confident so readers can fix issues without guesswork.
Key Takeaways
- Start troubleshooting PC gaming performance problems by measuring FPS, CPU/GPU load, and temperatures to identify precise bottlenecks.
- Update or clean-install GPU drivers, clear shader caches, and adjust in-game graphics settings to fix common GPU-related performance issues.
- Disable overlays and close background applications that spike CPU, GPU, or disk usage to improve game stability and frame pacing.
- Monitor system temperatures and clean cooling components regularly to prevent thermal throttling that causes sudden FPS drops.
- Ensure games are installed on SSDs and upgrade to at least 16 GB of fast RAM for smoother performance, especially avoiding large pagefile usage on HDDs.
- Follow a step-by-step checklist—reboot, capture performance data, update drivers, adjust settings, and verify game files—to systematically resolve gaming performance problems.
Diagnose The Problem: Measure Performance And Identify Symptoms
Start with the answer: measure performance first, then diagnose. A simple overlay reveals patterns and points directly at causes.
Begin by enabling an FPS counter and performance overlay. Use built-in options (Steam/Steam Overlay, Xbox Game Bar) or MSI Afterburner with RivaTuner for CPU/GPU/VRAM graphs. Record a short gameplay clip of the issue while the overlay runs. That single file gives raw data: average FPS, minimum FPS, and frequency of spikes.
Next, identify the symptom pattern. Low but steady FPS usually means settings exceed the GPU capability or the resolution is too high. Periodic stutter or micro‑stutter often traces to shader compile, storage I/O, or intermittent background tasks. Sudden drops after several minutes point to thermal throttling or memory pressure.
Watch usage percentages and temperatures while reproducing the issue. When GPU or CPU stays at 98–100% while FPS is low, the hardware is the bottleneck. If both stay low but disk usage spikes, storage I/O or background processes are likely. Sustained temperatures above 80–85 °C commonly cause throttling on desktop GPUs and CPUs.
Check whether the problem is game‑specific. If only one title shows the issue, test file integrity through the game launcher and consider driver or shader cache problems. If every game behaves poorly, the fault is system‑wide and should shift the investigation toward drivers, power settings, or cooling.
For a compact diagnostic workflow and deeper resource checks, consult a guide that explains using Task Manager and overlays to find bottlenecks: a reputable external walkthrough helps validate the steps and benchmarks. performance walkthrough
Graphics, Drivers, And In-Game Settings: Fix The Usual GPU Culprits
Answer first: update or roll back the GPU driver and simplify heavy graphics features.
Install the latest stable driver from NVIDIA, AMD, or Intel. If the problem began after a recent driver update, perform a clean install or roll back to the prior release. Drivers can introduce regressions: a clean driver reinstall removes leftover files and corrupted shader caches.
Clear or reset the shader cache using the GPU control panel or by deleting the shader cache folder for the affected game. Rebuilding the shader cache often cures long stutters on first load and micro‑stutter during shader compilation.
Disable overlays next. Overlays from Xbox Game Bar, Discord, GeForce Experience, or Steam can inject frame pacing issues and CPU pulses. Turn them off, then test again. Also disable background recording or instant replay features that use GPU cycles.
Adjust demanding settings: turn off ray tracing, reduce shadow quality, lower volumetrics, and lower anti‑aliasing. If the monitor’s refresh rate is 144 Hz or higher, set a modest FPS cap (e.g., 120 FPS for a 144 Hz panel). Capping prevents unnecessary frame variance and reduces CPU/GPU spikes.
Match native resolution and avoid supersampling (DSR/VSR). Supersampling increases GPU load significantly. When upgrading, compare a GPU spec table from a recent analysis, this clarifies whether the card should reach the desired frame rates in modern titles.
For a broader context on hardware and platform choices, readers can reference RevolverTech’s central gaming guide for gear and updates: that resource groups driver tips with hardware recommendations and community patches. gaming guide
System Resources, Background Tasks, And Thermal/Hardware Checks
Short answer: free resources and fix heat before changing expensive components.
Open Task Manager and sort by CPU, GPU, and disk to find programs that spike usage. Close browsers with many tabs, launchers, or cloud sync apps that run periodic scans. RGB utilities and vendor update services often run constantly: end them temporarily. Adjust Windows power to High Performance or Ultimate Performance to prevent aggressive power saving on CPU/GPU.
Thermal issues are a common surprise. Dust buildup raises temperatures quickly. A visible sign is fans ramping to maximum RPM long before heavy load. Clean heat sinks and intake filters, reseat the GPU if sag or poor contact is present, and replace old thermal paste on CPUs that have never been serviced. On laptops, a cooling pad lowers chassis temperature by 5–10 °C in many tests.
RAM capacity and speed matter. If gaming forces large pagefile usage on a spinning HDD, stutters will occur. Upgrade to at least 16 GB of fast RAM and install games on an SSD when possible. Dual‑channel memory offers measurable gains in CPU‑bound scenarios compared with single‑channel configurations.
If hardware checks reveal thermal throttling or failing fans, fix cooling first. A repaired cooler often restores stable clocks and removes sudden FPS drops without buying a new GPU. For noisy systems, a dedicated piece covering noise reduction provides data on balancing airflow and sound. quiet PC setup
If the user wants to track skill and performance while solving system issues, linking telemetry to play sessions helps correlate hardware changes with in‑game metrics. RevolverTech explores that approach in its monitoring coverage. performance tracking
Conclusion: A Step‑By‑Step Checklist To Keep Your PC Gaming Smooth
Core takeaway: follow the checklist in order and verify after each step.
- Reboot and update Windows and the game. 2. Enable overlays and reproduce while capturing data. 3. Update or clean‑install GPU drivers: clear shader cache. 4. Turn off overlays and close background apps. 5. Lower demanding graphics and set a sensible FPS cap. 6. Inspect temps, clean cooling, and verify fans. 7. Verify game files and test a second title.
For readers choosing hardware upgrades, compare midrange and high‑end options with practical matchups to your target resolution and refresh rate. RevolverTech’s comparisons help decide whether a $2000 PC upgrade is worthwhile for current titles. upgrade comparison
A final honest note: troubleshooting often reveals multiple small issues rather than one big fault. Patience and measurement save time and money. When simple fixes fail, documenting steps and sharing logs on community threads or with a repair shop speeds diagnosis.