
A noisy PC usually isn’t “just loud.” It’s a system giving signals. Heat pushes fans harder, vibration turns into rattles, and dust slowly blocks airflow until everything has to work twice as hard. The frustrating part is that many people respond by buying random “silent” parts, then feel disappointed when the sound barely changes. The smarter approach is smaller and calmer: identify the loudest source first, fix the cause, then upgrade only where it actually matters.
There’s also a psychological trap here. When noise becomes annoying, the brain wants a quick cure, the same way people look at lucky numbers today and hope for instant certainty. Quiet PC tuning doesn’t reward hope. It rewards testing. A few controlled changes can cut noise dramatically, while pointless spending usually happens when changes are made without measurements.
Step One: Name The Sound Before Buying Anything
Different noises mean different problems. A smooth whoosh is airflow. A high-pitched whine can come from a small fan spinning too fast or from coil whine on a GPU. A rattle often means vibration, a loose panel, or a fan bearing starting to wear out.
A simple check helps. Listen at idle for one minute, then run a real load for five minutes, like a game or a benchmark. Notice how fast the noise appears. Noise that spikes instantly often points to aggressive fan curves. Noise that ramps up slowly usually points to heat buildup or restricted airflow. Noise that changes when the case is lightly pressed often points to vibration.
Step Two: Clean Airflow Is The Cheapest Quiet Upgrade
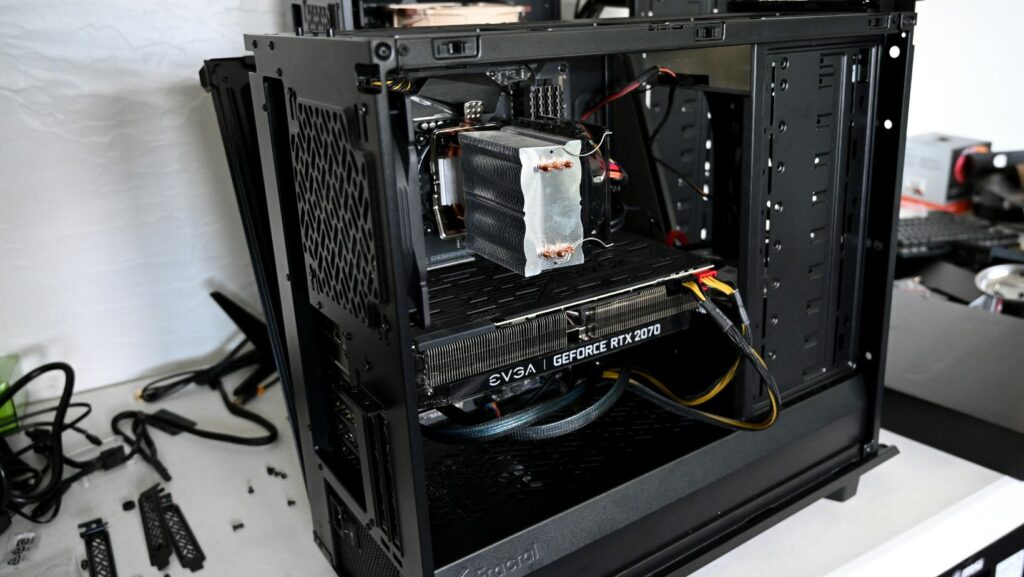
Dust is not cosmetic. Dust is heat. Heat makes fans spin faster. Cleaning filters, fans, and heatsinks often gives the biggest noise reduction per minute spent. Filters should be washed or replaced. Heatsink fins should be cleared carefully. Fans should be cleaned without bending blades.
Airflow also depends on a clear path. If cables block the front intake, cool air can’t reach the GPU and CPU efficiently. Tidier cable routing can drop temperatures, which drops fan speed, which drops noise. That is the quiet chain reaction that costs nothing.
Step Three: Set Fan Curves That Don’t Panic
Default fan settings are built for safety and simplicity, not for silence. Many profiles ramp up too quickly for small temperature changes. A better curve keeps fans low at idle and light loads, then increases smoothly instead of jumping like a siren.
A calm curve also accepts small temperature swings. Not every short spike needs an instant response. A few extra degrees during a quick task usually doesn’t matter, while the noise spike absolutely does.
Step Four: Fix Vibration Before Chasing “Silent Parts”
Vibration creates a cheap, annoying sound that can make a decent build feel awful. Loose screws, thin side panels, and hard-mounted drives can all amplify vibration. This is why the case can sound louder than the components inside it.
Rubber fan mounts, grommets, and simple tightening checks can remove rattles fast. If a hard drive is present, isolating it or moving it to a better mount can change the whole sound profile. Vibration problems are often misdiagnosed as “bad fans.”
The Few Upgrades That Usually Pay Off
Upgrades work best when they solve a specific bottleneck. Buying premium fans for a case with restrictive airflow can still leave the system loud, because the fans will keep working hard.
Upgrading the CPU cooler won’t help if the GPU is the true noise source.
Smart upgrades that tend to deliver real results for the money:
- Replace the single loudest fan first, not the entire set
- Add rubber mounts to reduce fan and drive vibration
- Use a better CPU cooler only if CPU temperatures trigger constant ramping
- Undervolt the GPU or CPU to lower heat without sacrificing much performance
- Improve intake airflow if the case is starving for cool air
The goal is targeted change. One strong fix beats five random ones.
What To Ignore: Popular “Quiet” Myths
Some advice sounds logical but often disappoints. Foam panels can reduce certain frequencies, but they don’t solve overheating. If a GPU is running hot, fans will still scream. Expensive thermal paste won’t save a system with blocked airflow. “Silent mode” in software can also be misleading if it simply raises temperature limits and shifts noise into sudden bursts later.
Coil whine is another area where money gets wasted. It can be reduced with undervolting, frame limiting, or different power settings, but it’s not always fixable through simple part swaps. Treat it as a separate problem from fan noise.
A Practical Quiet-PC Routine That Prevents Useless Spending
A quiet setup comes from predictable maintenance and small checks. It doesn’t require chasing perfection. It requires keeping the system from drifting into a dusty, hot, vibrating mess.
A repeatable checklist that keeps noise under control:
- Clean filters and heatsinks, then re-test noise under the same workload
- Confirm fan direction for a clean front-to-back airflow path
- Route cables away from intake zones and GPU cooling areas
- Tune fan curves to ramp smoothly, not aggressively
- Tighten panels and mounts, then hunt for vibration points
- If a hard drive is used, isolate it or relocate it to a better bay
- Re-test with real tasks, not just idle
This routine works because it uses feedback. Each change is verified instead of assumed.
Quiet Is A Measurable Outcome, Not A Shopping List
A quiet PC is built through control: clean airflow, stable mounting, and fan behavior that matches real workload patterns. The best results usually come from boring steps done well, not from dramatic upgrades.
When noise is treated like a problem to diagnose, spending becomes smaller and results become bigger. That’s the real quiet upgrade.